手工搭建lnmp环境(centos 7.2)-九游平台
简介
lnmp分别代表linux、nginx、mysql和php,是目前主流的网站服务器架构之一,适合运行大型和高并发的网站应用,例如电子商务网站、社交网络、内容管理系统等。本文主要介绍了在华为云上如何使用centos 7.2 64位操作系统的linux实例搭建lnmp环境。
前提条件
- 弹性云服务器已绑定弹性公网ip。
- 弹性云服务器所在安全组添加了如下表所示的安全组规则,具体步骤参见为安全组添加安全组规则。
表1 安全组规则 方向
优先级
策略
类型
协议端口
源地址
入方向
1
允许
ipv4
tcp: 80
0.0.0.0/0
- 为了更好的获取和更新系统和软件,建议您更新镜像源为华为云镜像源,详细操作,请参见。
资源规划
本次实践所用的资源配置及软件版本如表2中所示。当您使用不同的硬件规格或软件版本时,本指导中的命令及参数可能会发生改变,需要您根据实际情况进行调整。
|
资源 |
资源说明 |
成本说明 |
|---|---|---|
|
弹性云服务器 |
|
ecs涉及以下几项费用:
具体的计费方式及标准请参考计费模式概述。 |
|
nginx |
是一个高性能的http和反向代理web服务器。 获取方式: |
免费 |
|
mysql |
是一款开源的关系数据库软件。 获取方式: |
免费 |
|
php |
是一款开源软件,用于web开发。 获取方式: |
免费 |
操作步骤
- 安装nginx。
- 登录弹性云服务器。
- 执行以下命令,下载对应当前系统版本的nginx包。
wget http://nginx.org/packages/centos/7/noarch/rpms/nginx-release-centos-7-0.el7.ngx.noarch.rpm
- 执行以下命令,建立nginx的yum仓库。
rpm -ivh nginx-release-centos-7-0.el7.ngx.noarch.rpm
- 执行以下命令,安装nginx。
yum -y install nginx
- 执行以下命令,查看nginx版本。
nginx -v
回显如下类似信息。
nginx version: nginx/1.26.1
- 执行以下命令,启动nginx并设置开机启动。
systemctl start nginx
systemctl enable nginx
- 查看启动状态。
systemctl status nginx.service
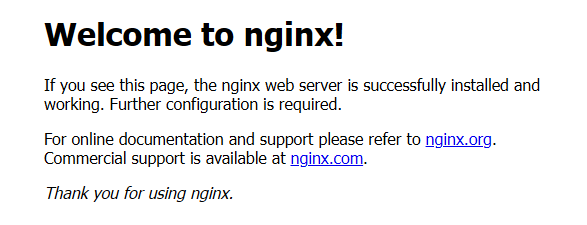
- 使用浏览器访问 “http://服务器ip地址”,显示如下页面,说明nginx安装成功。
图1 测试访问nginx
- 安装mysql。
- 依次执行以下命令,安装mysql。
rpm -uvh https://dev.mysql.com/get/mysql80-community-release-el7-11.noarch.rpm
yum -y install mysql-community-server
- 执行以下命令,查看mysql版本。
mysql -v
回显如下类似信息。
mysql ver 8.0.39 for linux on x86_64 (mysql community server - gpl)
- 依次执行以下命令,启动mysql服务并设置开机自启动。
systemctl start mysqld
systemctl enable mysqld
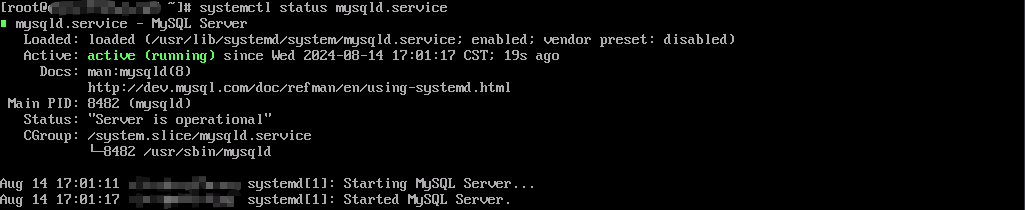
- 查看mysql运行状态。
systemctl status mysqld.service
回显如下类似信息。
- 执行以下命令,获取安装mysql时自动设置的root用户密码。
grep 'temporary password' /var/log/mysqld.log
回显如下类似信息。2018-08-29t07:27:37.541944z 1 [note] a temporary password is generated for root@localhost: 2yy?3uhua?ys
- 执行以下命令,并按照回显提示信息进行操作,加固mysql。
mysql_secure_installation
securing the mysql server deployment.
enter password for user root:    #输入上一步骤中获取的安装mysql时自动设置的root用户密码
the existing password for the user account root has expired. please set a new password.
new password:  #设置新的root用户密码
re-enter new password:   #再次输入密码
the 'validate_password' plugin is installed on the server.
the subsequent steps will run with the existing configuration of the plugin.
using existing password for root.
estimated strength of the password: 100
change the password for root ? ((press y|y for yes, any other key for no) : n   #是否更改root用户密码,输入n
 ... skipping.
by default, a mysql installation has an anonymous user,
allowing anyone to log into mysql without having to have
a user account created for them. this is intended only for
testing, and to make the installation go a bit smoother.
you should remove them before moving into a production
environment.
remove anonymous users? (press y|y for yes, any other key for no) : y   #是否删除匿名用户,输入y
success.
normally, root should only be allowed to connect from 'localhost'. this ensures that someone cannot guess at the root password from the network.
disallow root login remotely? (press y|y for yes, any other key for no) : y   #禁止root远程登录,输入y
success.
by default, mysql comes with a database named 'test' that anyone can access. this is also intended only for testing, and should be removed before moving into a production environment.
remove test database and access to it? (press y|y for yes, any other key for no) : y   #是否删除test库和对它的访问权限,输入y
 - dropping test database...
success.
 - removing privileges on test database...
success.
reloading the privilege tables will ensure that all changes
made so far will take effect immediately.
reload privilege tables now? (press y|y for yes, any other key for no) : y   #是否重新加载授权表,输入y
success.
all done!
- 依次执行以下命令,安装mysql。
- 安装php。
- 执行以下命令,安装epel源和remi仓库。
yum install -y epel-release
rpm -uvh https://mirrors.huaweicloud.com/remi/enterprise/remi-release-7.rpm
- 执行以下命令,安装yum源管理工具。
yum -y install yum-utils
- 执行以下命令,启用php 8.0仓库。
yum-config-manager --enable remi-php80
- 执行以下命令,安装php。
yum install -y php php-cli php-fpm php-mysqlnd php-zip php-devel php-gd php-mcrypt php-mbstring php-curl php-xml php-pear php-bcmath php-json
- 执行以下命令,验证php的安装版本。
php -v
回显如下类似信息:

- 执行以下命令,启动php服务并设置开机自启动。
systemctl start php-fpm
systemctl enable php-fpm
- 修改nginx配置文件以支持php。
- 执行以下命令打开配置文件/etc/nginx/nginx.conf。
vim /etc/nginx/nginx.conf图2 nginx.conf

从nginx.conf可以看出,配置文件定向至/etc/nginx/conf.d/*.conf。
- 输入:quit退出nginx.conf。
- 执行以下命令打开配置文件/etc/nginx/conf.d/default.conf。
vim /etc/nginx/conf.d/default.conf
- 按i键进入编辑模式。
- 修改打开的“default.conf”文件。
找到server段落,修改或添加下列配置信息。
server { listen 80; server_name localhost; #access_log /var/log/nginx/host.access.log main; location / { root /usr/share/nginx/html; index index.html index.htm index.php; } location ~ \.php$ { root /usr/share/nginx/html; fastcgi_pass 127.0.0.1:9000; fastcgi_index index.php; fastcgi_param script_filename $document_root$fastcgi_script_name; include fastcgi_params; } }如图3所示:
图3 修改后截图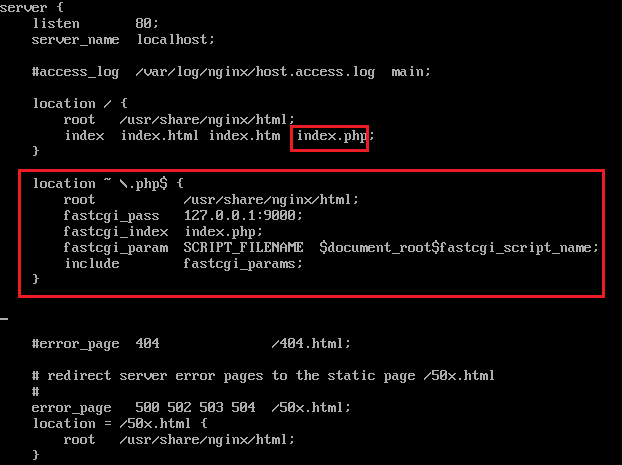
- 按esc键退出编辑模式,并输入:wq保存后退出。
- 执行以下命令打开配置文件/etc/nginx/nginx.conf。
- 执行以下命令,重新载入nginx的配置文件。
service nginx reload
- 执行以下命令,安装epel源和remi仓库。
- 浏览器访问测试。
- 在/usr/share/nginx/html/目录下创建“info.php”的测试页面。
- 执行以下命令创建并打开“info.php”的测试文件。
vim /usr/share/nginx/html/info.php
- 按i键进入编辑模式。
- 修改打开的“info.php”文件,将如下内容写入文件。
- 按esc键退出编辑模式,并输入:wq保存后退出。
- 执行以下命令创建并打开“info.php”的测试文件。
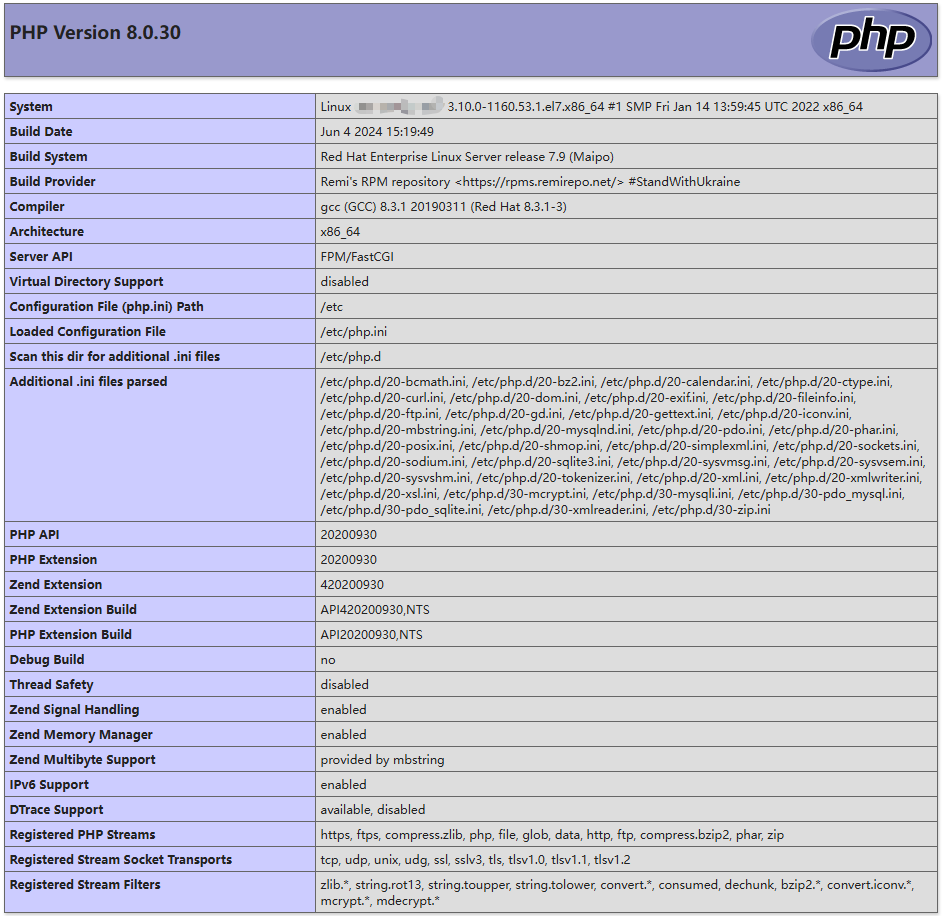
- 使用浏览器访问“http://服务器ip地址/info.php”,显示如下页面,说明环境搭建成功。
- 在/usr/share/nginx/html/目录下创建“info.php”的测试页面。
相关文档
意见反馈
文档内容是否对您有帮助?
如您有其它疑问,您也可以通过华为云社区问答频道来与我们联系探讨


